
Under Extrusion 3D Print Not Filling Layers? Quick Fix Guide

Seeing gaps, thin walls, or top layers that won’t close? This Under Extrusion quick fix guide walks you through simple checks and slicer tweaks to get solid prints again. Read it now.
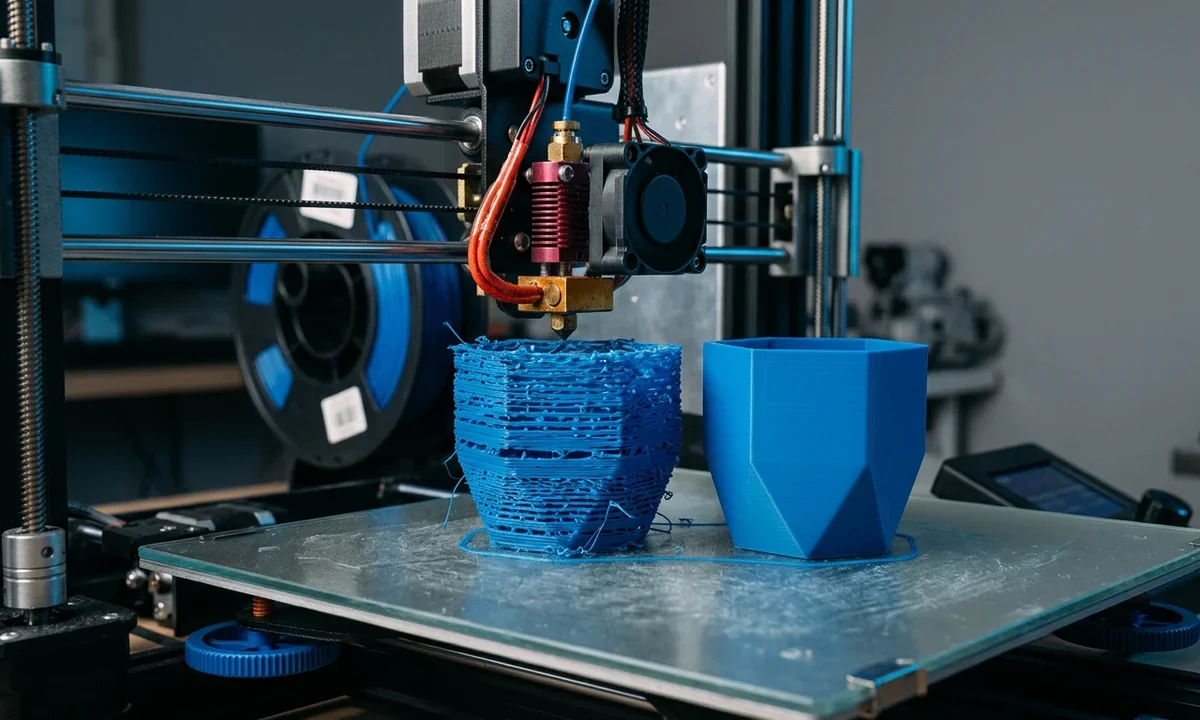
The part looked fine from a distance. Up close, it was a mess.
Tiny gaps between lines. Top layers you could almost see through. Walls that felt more like lattice than plastic. I've had people bring me brackets that snapped in their hands with almost no force, convinced their filament was "just bad."
It wasn't the filament. It was under extrusion.
Under Extrusion in a 3D print happens when your printer simply isn't pushing out as much material as the slicer expects. The machine thinks it's laying down a solid 0.45 mm line. In reality, it's extruding something thinner. That mismatch shows up as extrusion gaps, weak infill, brittle walls, and top surfaces that never fully close.
What makes this frustrating is how subtle it can be at first. Your printer still moves normally. Layers still stack. There's no dramatic failure like a spaghetti print. Instead, you get parts that look "almost fine" but never feel solid.
The good news? Most 3D Printer Under Extrusion issues follow patterns. If you approach it in the right order - starting with obvious mechanical checks and moving toward calibration - you can fix it without wasting another half-spool chasing random slicer tweaks.
This guide walks you through that exact sequence.
Identifying Under Extrusion Symptoms vs Other 3D Print Issues
Before you start turning knobs or editing firmware, you need to confirm what you're actually dealing with. I've seen countless users chase cooling settings or bed leveling when the real issue was inconsistent extrusion.
Let's get specific.
1Classic Signs of 3D Print Under Extrusion
When I diagnose a machine, I look for three things immediately: line consistency, surface density, and part strength.
Here's what true Under-Extrusion usually looks like:
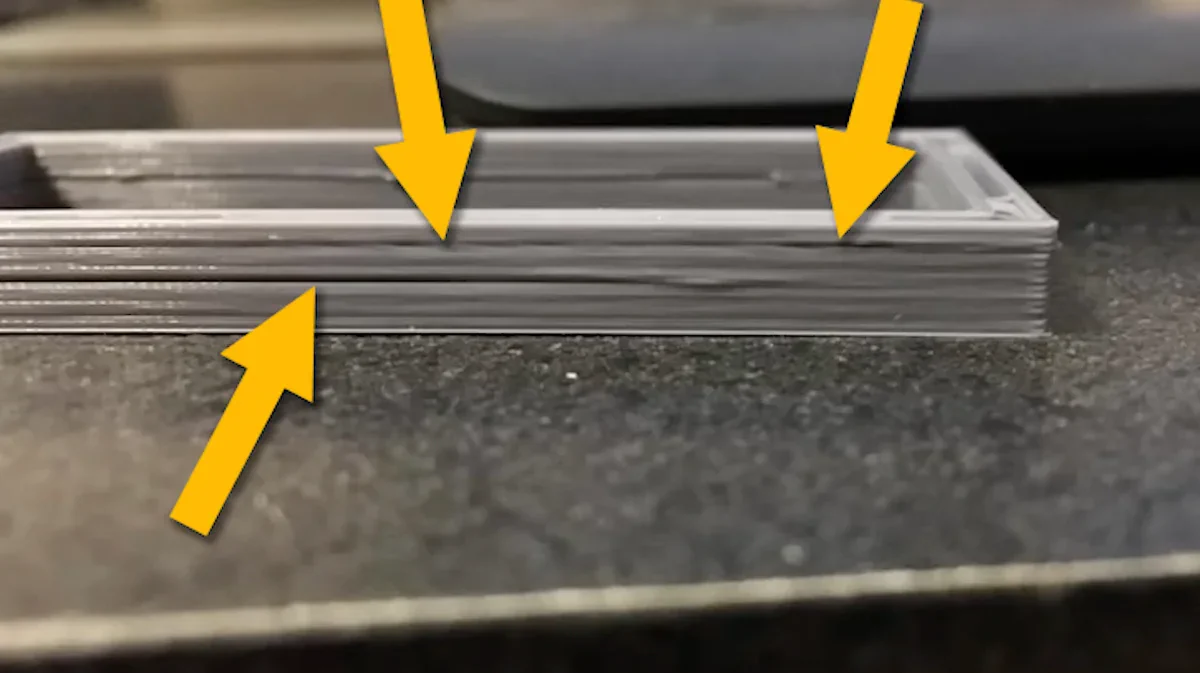
- Gaps between adjacent extrusion lines
On walls or top layers, you'll see faint valleys where lines should be fused. Instead of a smooth surface, it looks lightly ribbed. - See-through or patchy top layers
Even after 5-6 top layers, the infill pattern telegraphs through. You might see little pinholes where lines never fully merged. - Weak infill structure
Pick up the part and gently squeeze. If it flexes more than it should or cracks along infill lines, flow is suspect. - Sparse-looking walls
Single-perimeter prints reveal this clearly. Lines look rounded and narrow instead of slightly squished and rectangular. - Clicking or grinding from the extruder
That sharp ticking sound? That's often the drive gear slipping because resistance is too high or flow demand exceeds capability.
Many users describe this as "Inconsistent Extrusion." And they're right. Sometimes it's not constant. You might see strong sections followed by thin, starved segments.
That's a big clue.
2Distinguishing Extrusion Gaps from Layer Adhesion or Cooling Problems
This is where people get tripped up.
Under Extrusion 3D Print defects can look similar to cooling or adhesion problems - but the failure pattern tells the story.
Layer adhesion problems typically show horizontal splits between layers. You'll see clean separation lines, often across the entire part. The extrusion width within each layer still looks normal.
With Under Extrusion, the weakness is within the layer itself. Lines aren't fully bonding side to side. The gaps run parallel to extrusion paths, not between layers.
Cooling issues (especially with PLA) tend to create curling edges, poor overhangs, or rough bridging. But the lines themselves still appear full-width.
If the plastic looks thin everywhere - walls, infill, top layers - that's extrusion, not cooling.
Another differentiator:
If increasing temperature slightly improves strength and surface closure, you're probably dealing with flow limitation, not cooling.
3Quick Test Prints to Confirm Under Extrusion
Don't guess. Print something diagnostic.
I use two simple tests:
1. Single-wall cube (no top, no infill)
- 0.4 mm nozzle
- 0.45 mm line width
- 0.2 mm layer height
- One perimeter only
Print it and measure the wall thickness with calipers. If your slicer says 0.45 mm and you measure 0.38-0.40 mm consistently, you have a flow mismatch.
2. 20 mm calibration cube
Look at the top surface. If after 5 solid layers you still see infill lines clearly, and the top feels slightly rough instead of smooth, you're under extruding.
Many makers on Reddit's r/3Dprinting report chasing bed leveling for weeks before running a single-wall test and realizing their flow rate was 8-10% low.
That's not rare.
Once you confirm that your 3D Print Under Extrusion is real and consistent, you can start narrowing down why it's happening.
Common Causes of Under Extrusion in FDM 3D Printing
Under extrusion doesn't come from one source. It's usually resistance or miscalibration somewhere along the filament path - from spool to nozzle tip.
Let's break it down in the order I typically check machines.
1Nozzle Clogs, Partial Blockages, and Hotend Issues
Full clogs are obvious. Nothing comes out.
Partial clogs are sneaky.
A bit of burnt PLA, carbonized residue from printing too hot, or a tiny contaminant can reduce effective nozzle diameter. Your 0.4 mm nozzle might effectively behave like a 0.3 mm opening. The slicer doesn't know that.
Heat creep is another common culprit, especially on Ender-style machines with marginal hotend cooling. If heat travels up the heat break, filament softens too early and creates internal friction. The extruder has to push harder, leading to slipping and Under Extrusion 3D Print artifacts.
Also consider nozzle wear. If you've run glow-in-the-dark or carbon fiber filament through a brass nozzle, it might be enlarged unevenly. That can produce inconsistent line widths - sometimes over, sometimes under.
If you haven't changed the nozzle in months, it's worth inspecting.
2Filament Problems: Diameter, Moisture, and Poor Winding
Filament is often blamed - and sometimes rightly so.
Start with diameter. Most slicers assume 1.75 mm exactly. But I've measured budget spools fluctuating between 1.68 mm and 1.80 mm. That's not trivial. A thinner section means less plastic per millimeter extruded, leading directly to under-filled layers.
Moisture plays a role too. Wet filament doesn't just string - it can expand and create inconsistent back pressure in the nozzle. That inconsistency translates to uneven flow.
And don't ignore spool winding. A tight tangle or snag forces the extruder to fight sudden resistance spikes. That's when you hear clicking and see intermittent Inconsistent Extrusion.
Before diving into firmware, physically pull filament through by hand with the nozzle hot. It should move smoothly and steadily.
3Extruder Hardware: Drive Gear, Idler Tension, and Bowden vs Direct Drive
I've opened extruders packed with filament dust so thick the teeth barely gripped.
Check your drive gear. If it's worn smooth or clogged with debris, it won't bite properly. The motor turns - but the filament doesn't advance as expected.
Idler tension matters too. Too loose, and the gear slips. Too tight, and you deform the filament, increasing friction down the line.
Bowden setups add another layer of complexity. Long PTFE tubes introduce more resistance and compression. At higher speeds, the system struggles to maintain steady Flow Rate, especially with higher Layer Height settings.
Direct drive systems are more forgiving, but they're not immune to worn gears or misaligned filament paths.
4Slicer Configuration: Flow Rate, Line Width, and Layer Height
Now we get into settings.
If your extrusion multiplier (Flow Rate) is set to 90%, you're under extruding by design. Some people lower flow to reduce blobs without realizing they're starving the print.
Line width matters too. If you're asking a 0.4 mm nozzle to reliably produce 0.6 mm lines at high speed, you're demanding higher volumetric flow. Combine that with a 0.28 mm Layer Height, and you may exceed what your hotend can melt consistently.
The slicer won't warn you.
It just assumes your printer can keep up.
When walls don't meet or top layers don't seal, I always check whether someone increased layer height for "faster prints" without adjusting temperature or speed.
5Print Speed and Temperature Limiting Volumetric Flow
This is the big one most advanced users overlook.
Every hotend has a maximum volumetric flow rate - measured in cubic millimeters per second. For many stock Creality-style hotends, it's around 8-12 mm³/s with PLA.
If you print at 60 mm/s, 0.2 mm layer height, and 0.45 mm line width, you're at about 5.4 mm³/s. Safe.
But bump that to 0.28 mm layer height and 80 mm/s? Now you're pushing beyond 10 mm³/s. If temperature is low, the filament won't fully melt in time.
The result?
Under Extrusion 3D Print gaps - even though nothing is technically "broken."
Sometimes the fix isn't mechanical at all. It's simply slowing down or raising temperature 5-10°C to allow stable melt flow.
And that's where we'll head next.
Under ExtrusionQuick Fix Sequence: Fast Mechanical and Slicer Tweaks for Better Extrusion
When someone messages me about 3D Printer Under Extrusion, they usually want to jump straight into E-steps or firmware edits.
Slow down.
Nine times out of ten, you can restore solid, gap-free layers in under 20 minutes by working through a simple, logical sequence. Start mechanical. Then adjust temperature and speed. Only after that do you touch flow settings.
Here's the order I use in my own shop.
1Five-Minute Mechanical Checks Before Changing Slicer Settings
2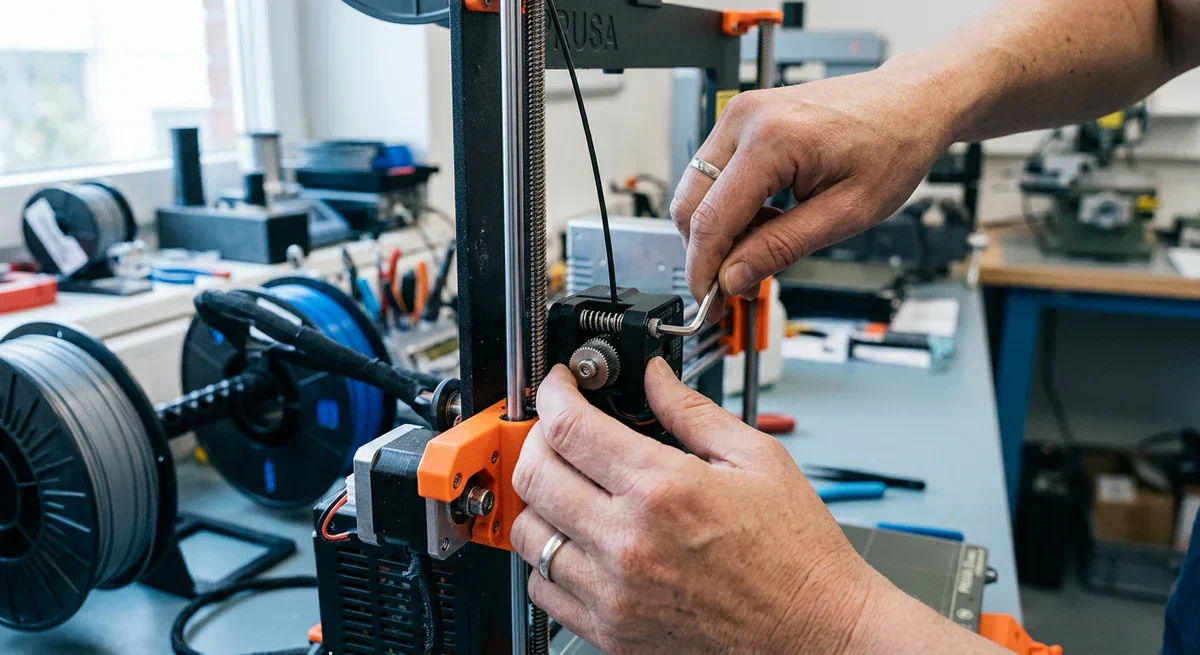
Before you open your slicer, physically inspect the extrusion path.
1. Check the spool.
Make sure filament is unwinding freely. Tug gently. If you feel jerking resistance, look for crossed loops or tight coils. A snag can create momentary starvation that shows up as random extrusion gaps.
2. Inspect the extruder gear.
Open the lever and look at the drive gear teeth. Are they packed with filament dust? Clean them with a stiff brush or a needle. If the teeth are rounded or polished smooth, they won't grip properly under load.
3. Verify idler tension.
If your extruder has an adjustable spring, confirm it's neither loose nor cranked down excessively. I aim for firm contact without visibly flattening the filament.
4. Heat the nozzle and manually extrude.
With the hotend at normal printing temperature, push filament through slowly using the extruder control. The strand should come out straight and steady. If it curls sharply to one side or pulses unevenly, you likely have a partial clog.
5. Look at the nozzle tip.
Burnt residue around the opening can restrict flow or deflect extrusion slightly. A brass brush while hot can clean light buildup. If you've been printing abrasive materials, just replace the nozzle. They're consumables.
These steps sound basic. They aren't. I've fixed more cases of Under-Extrusion with a five-minute inspection than with any advanced calibration.
Only once mechanical resistance is ruled out should you move on.
3Temperature and Speed Adjustments to Restore Stable Flow
If the hardware looks healthy, think about melt capacity.
Your hotend can only liquefy so much plastic per second. When you exceed that, flow thins out. That's classic 3D Print Under Extrusion caused by volumetric limits.
Two fast adjustments:
Increase nozzle temperature by 5-10°C.
Higher temperature lowers viscosity. The filament flows more easily, reducing back pressure. With PLA, if you're printing at 195°C, try 205°C and observe the top layer.
Reduce print speed by 10-20%.
Slowing from 60 mm/s to 45-50 mm/s often brings extrusion back into a stable range, especially with higher layer heights.
Watch the top surface after these changes. If extrusion gaps begin to close and lines flatten slightly, you've confirmed a flow limitation rather than a calibration issue.
A quick note about Layer Height:
If you're running 0.28 mm layers on a stock 0.4 mm nozzle and seeing underfilled surfaces, consider dropping back to 0.2 mm temporarily. Thinner layers demand less material per second and give your hotend more margin.
It's not glamorous advice. But it works.
4Adjusting Flow Rate and Extrusion Multiplier Safely
If temperature and speed adjustments improve things but don't fully eliminate under extrusion, it's time to fine-tune flow.
Most slicers call this Flow Rate or Extrusion Multiplier.
Resist the urge to jump straight to 110%. That's how you create blobs and dimensional inaccuracy.
Instead:
- Increase flow by 2-3%.
- Print a small single-wall test or calibration cube.
- Examine wall thickness and surface closure.
- Repeat if necessary.
You're looking for a point where walls look slightly squished together with no visible valleys between lines - but without bulging corners or excessive elephant's foot on the first layer.
In my experience, many machines benefit from a 3-6% increase over default profiles, especially budget printers where factory E-steps are a bit conservative.
Keep in mind: raising flow compensates for under-delivery, but it doesn't fix mechanical slippage. If the extruder is grinding, flow increases won't solve the root cause.
5Tuning Infill Overlap, Wall Count, and Top Layers to Close Gaps
Sometimes extrusion is marginal - not catastrophically low, but just shy of ideal. You can often close visible surface gaps by adjusting structural settings.
Infill Overlap:
Increase overlap with walls from, say, 10% to 15-20%. This ensures infill lines press firmly into perimeters instead of barely touching.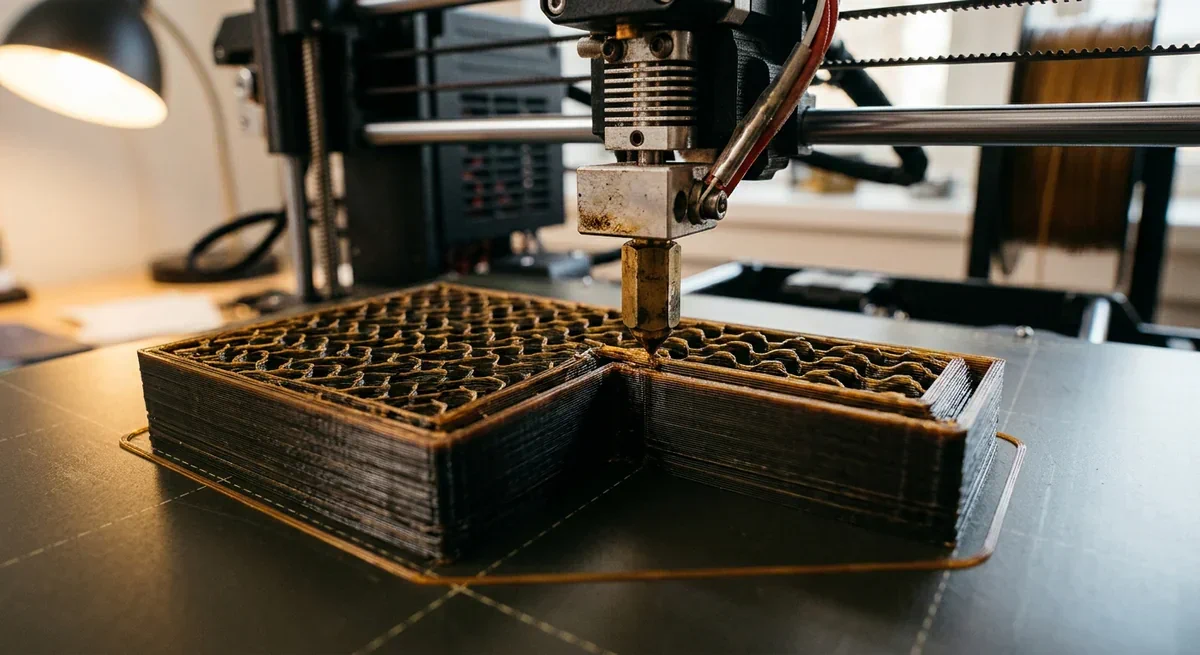
Add one extra wall.
Going from 2 to 3 perimeters dramatically improves part strength and hides minor flow inconsistencies. Thin walls are less forgiving.
Increase top layers.
If your top surface isn't sealing, adding two additional solid layers can compensate for slight under extrusion. It gives more opportunities for lines to merge and flatten.
These are not band-aids - they're practical adjustments used by experienced makers printing functional parts. When printing brackets or enclosures, a bit of structural redundancy is rarely a bad thing.
At this stage, most users see significant improvement. If you're still observing persistent Under Extrusion 3D Print artifacts across materials and speeds, it's time to dig deeper into calibration.
And that's where systematic measurement replaces guesswork.
Under ExtrusionDeeper Calibration: E-Steps, Flow Calibration, and Advanced Checks
If you've worked through mechanical checks, adjusted temperature and speed, and fine-tuned Flow Rate with only partial improvement, you're likely dealing with a baseline calibration issue.
This is where we stop guessing and start measuring.
The goal isn't to "make it look better." It's to make extrusion predictable.
1Calibrating Extruder Steps/mm to Fix Systematic Under Extrusion
E-steps calibration corrects how much filament your printer believes it's pushing versus how much it actually moves.
Here's the simple workflow I've used on dozens of Ender-style machines:
- Heat the nozzle to normal printing temperature.
- Remove Bowden tube from the hotend (if applicable) so filament extrudes freely without back pressure.
- Mark the filament exactly 120 mm above the extruder entry using calipers.
- Command the printer to extrude 100 mm at a slow speed (around 100 mm/min).
- Measure the remaining distance to your mark.
If only 92 mm actually moved instead of 100 mm, you're under extruding by 8%.
Calculate the correction:
Update firmware, save settings, and repeat to confirm accuracy.
Why this matters:
If E-steps are off, every slicer profile you tweak is compensating for a mechanical miscalibration. Fix the baseline once, and everything else becomes easier.
I've seen printers under extruding 5-12% from the factory. That alone explains persistent extrusion gaps no slicer tweak could fully solve.
2Per-Filament Flow Calibration Using Thin-Wall Tests
Even after E-steps are correct, individual filament brands behave differently.
This is where true Flow Calibration comes in.
Print a single-wall cube:
- One perimeter
- No top
- No infill
- 0.2 mm layer height
- 0.45 mm line width
Measure wall thickness in multiple spots.
If your slicer specifies 0.45 mm and you measure 0.43 mm, increase flow slightly.
If you measure 0.48 mm, reduce flow.
Adjust in small increments - 1-2% at a time.
This is not a one-time universal number. PLA from Brand A may need 102%. PETG from Brand B might look perfect at 97%.
That's normal.
Serious hobbyists save separate profiles per filament type, each with tuned flow and temperature. It sounds excessive until you realize how much consistency it provides.
3Verifying Filament Diameter and Updating Slicer Settings
Most slicers assume filament is exactly 1.75 mm.
It rarely is.
Use calipers and measure diameter at five or six points across a few meters. Rotate the filament as you measure to detect ovality.
Average the readings and enter that number into your slicer.
If your filament averages 1.72 mm instead of 1.75 mm, that difference translates directly into lower volumetric output. The printer is pushing length accurately - but each millimeter contains less plastic.
This alone can cause subtle 3D Print Under Extrusion symptoms, especially on thin walls.
Also watch for large fluctuations. If one section measures 1.68 mm and another 1.80 mm, that's poor quality control. You'll see alternating dense and sparse layers - classic Inconsistent Extrusion.
Sometimes the solution isn't tuning.
It's switching filament brands.
4Diagnosing Edge Cases: Firmware Limits, Retraction, and Pressure Advance
If everything above checks out and you still see underfilled sections, you're entering edge-case territory.
A few things to consider:
Firmware volumetric limits:
Some firmware configurations cap maximum extrusion rates. If you're printing aggressively and hitting those limits, flow may be throttled silently.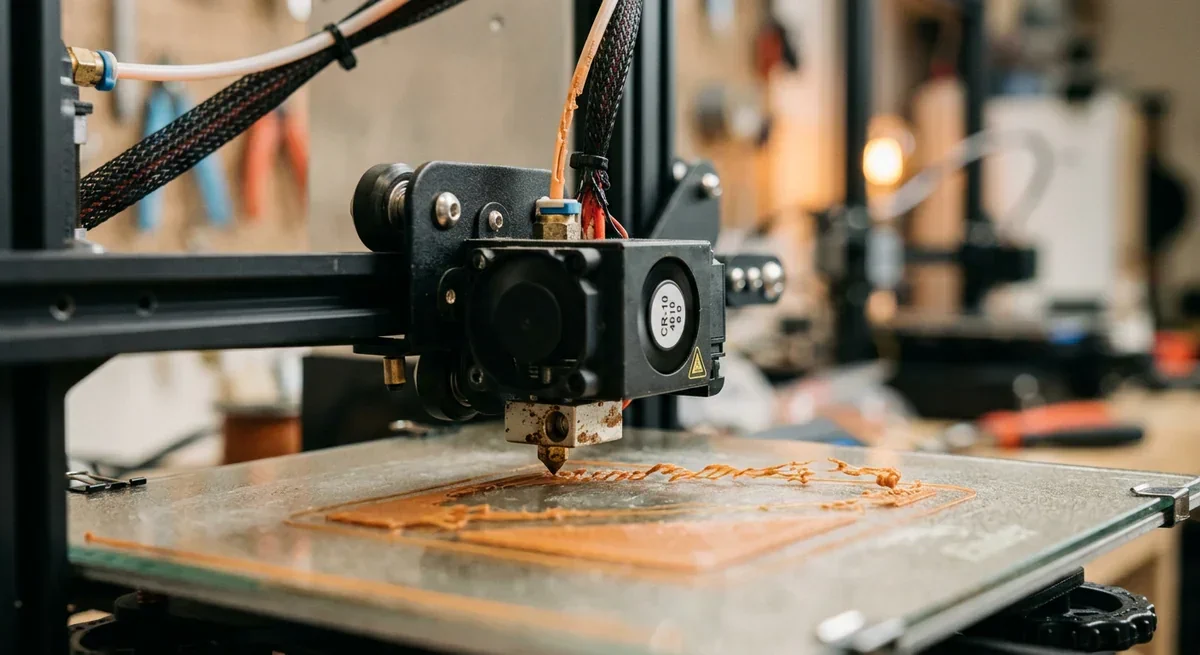
Excessive retraction:
Retraction distances that are too long (especially in Bowden setups) can introduce partial clogs or heat creep. If under extrusion occurs right after travel moves, reduce retraction distance slightly.
Pressure advance or linear advance misconfiguration:
Improperly tuned pressure advance can cause brief under extrusion at acceleration points. If corners look starved but straight lines are fine, this might be the culprit.
These are advanced tuning areas. Don't start here. But if basic calibration doesn't resolve the issue, they're worth investigating.
At this point, your extrusion system should be mechanically sound, properly calibrated, and matched to your filament.
If gaps still persist, we need to broaden the scope beyond extrusion alone.
And that's where advanced troubleshooting begins.
Advanced Troubleshooting and When Under Extrusion Isn't the Only Problem
Here's the uncomfortable truth: sometimes what looks like Under Extrusion isn't purely an extrusion problem.
I've seen users replace nozzles, recalibrate E-steps twice, dial in flow perfectly - only to discover the real issue was a loose coupler or a skipping stepper driver.
When prints still show gaps after you've handled the basics, it's time to zoom out.
1When Prints Still Show Gaps After Basic Fixes
If your calibration cube measures correctly, wall thickness matches slicer settings, and yet real-world parts still show extrusion gaps, pay attention to when the issue appears.
Is it random?
Does it happen only during longer prints?
Does it worsen as the printer heats up?
Intermittent Under Extrusion 3D Print symptoms often point to hardware that degrades under load or temperature.
A few specific culprits I've diagnosed repeatedly:
- Extruder motor overheating - If the stepper gets too hot, torque drops. That can cause subtle slipping without loud clicking.
- Stepper driver thermal throttling - Budget control boards sometimes reduce current as temperatures rise.
- Loose Bowden couplers - If the PTFE tube creeps upward slightly during retractions, it creates a small internal gap. Filament expands into that gap and restricts flow intermittently.
One giveaway is a print that starts strong and deteriorates halfway through.
That's rarely slicer-related.
2Inspecting Motion System, Belts, and Z Movement Side Effects
Not all thin walls are extrusion starvation.
Loose belts can cause slight positional inaccuracies. When perimeter lines don't land exactly adjacent to each other, they appear as tiny gaps - even if flow is correct.
This is subtle but real.
Check X and Y belt tension. They should be firm but not guitar-string tight. If you can deflect them easily with a finger, tighten slightly.
Also inspect:
- Worn V-wheels or linear bearings
- Play in the hotend carriage
- Loose eccentric nuts
If the nozzle shifts microscopically between passes, lines won't fuse properly.
Z-axis inconsistencies can compound the issue. If layer height fluctuates due to binding or wobble, the nozzle may ride slightly too high on certain layers, producing poor squish and what looks like 3D Printer Under Extrusion.
Watch the first few layers closely. If extrusion looks healthy at one Z height but slightly airy at another, you may have mechanical Z variation rather than flow miscalibration.
3Material-Specific Quirks: PLA, PETG, ABS, and Flexible Filaments
Different materials exaggerate under extrusion in different ways.
PLA
PLA is forgiving, but it solidifies quickly. If temperature is marginally low, lines won't merge fully. You'll see surface gaps even when flow is close. Increasing temperature 5°C often improves bonding dramatically.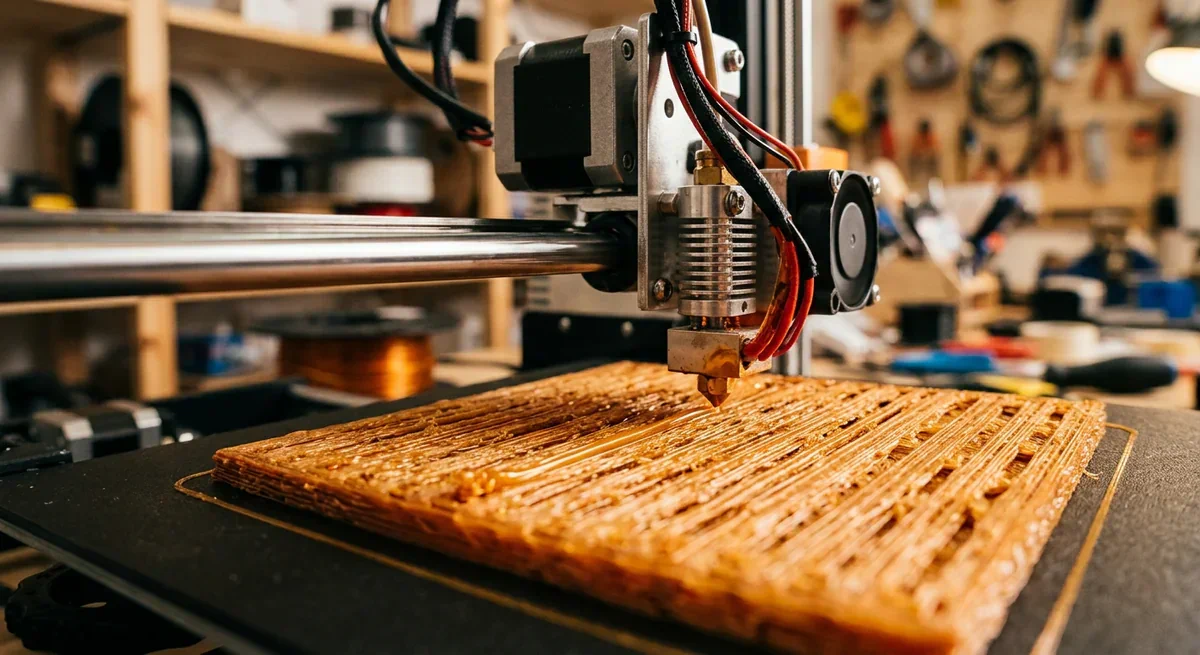
PETG
PETG likes to be slightly over-extruded. If calibrated perfectly on paper, PETG can still show tiny surface valleys. A 2-3% bump in Flow Rate often improves surface density without harming dimensional accuracy.
ABS
ABS demands higher heat. Printing ABS too cool almost always produces apparent under extrusion. Layers bond poorly and walls look underfilled, even if volumetric flow is adequate.
Flexible filaments
TPU and similar materials compress inside Bowden tubes. What looks like Under-Extrusion may simply be delayed extrusion due to compression and release. Slower speeds and reduced retraction are critical here.
The key is recognizing that not all Inconsistent Extrusion is mechanical failure. Sometimes it's simply mismatched settings for the material's behavior.
4Building a Repeatable Troubleshooting Workflow for Future Issues
Once you've fought through this once, don't rely on memory next time.
Create your own short checklist:
- Inspect spool and filament path.
- Clean and inspect nozzle and extruder gear.
- Confirm temperature and speed within safe volumetric limits.
- Verify E-steps accuracy.
- Run single-wall flow test.
- Inspect belts and motion system.
- Evaluate material-specific adjustments.
Print it. Tape it near your printer.
The difference between frustration and confidence is having a structured approach instead of random trial and error.
Most people jump straight to firmware changes.
That's usually a mistake.
5When to Replace Components Instead of Endlessly Tuning
There's a point where tuning becomes denial.
If:
- Your brass nozzle has printed dozens of abrasive spools.
- Your extruder gear teeth are visibly worn.
- Your Bowden tube interior feels rough or discolored.
- Your filament consistently measures out of spec.
Replace the part.
Nozzle wear alone can create inconsistent line widths that no amount of Flow Calibration will stabilize. Extruder assemblies on budget printers are inexpensive to upgrade and often dramatically improve reliability.
I've seen users spend weeks tweaking slicer settings to avoid replacing a $10 nozzle.
Sometimes the fastest fix is simply installing fresh hardware.
Preventing Under Extrusion in Future 3D Prints
Fixing Under Extrusion 3D Print issues once is satisfying.
Preventing them from returning is better.
Consistency in extrusion is largely about routine and habits.
1Simple Maintenance Routines for Nozzles, Extruders, and Filament Path
You don't need an elaborate maintenance schedule.
Just consistency.
Every few weeks (or every couple of spools):
- Perform a cold pull to remove internal debris.
- Brush the nozzle exterior while hot.
- Clean the extruder drive gear teeth.
- Inspect PTFE tube ends for deformation or discoloration.
- Check idler tension and fasteners.
Five minutes of preventative maintenance can eliminate most partial clogs before they evolve into full Under-Extrusion.
If you print frequently, consider replacing brass nozzles every few months. They're wear items, not permanent fixtures.
2Smart Filament Storage and Handling Habits
Moisture and tangles quietly sabotage extrusion quality.
Store filament in sealed containers with desiccant. If you live in a humid environment, a simple dry box setup makes a noticeable difference in consistency.
Before starting a long print:
- Inspect the first few layers for clean, uniform lines.
- Confirm the spool unwinds smoothly.
- Avoid forcing kinked filament through the extruder.
Filament that feeds effortlessly produces steadier Flow Rate and fewer surprises mid-print.
3Saving Calibrated Profiles and Documenting Working Settings
Once you dial in flow and temperature for a filament, save it as a separate slicer profile.
Label it clearly:
- "PLA Brand X - 205C - 102% Flow - 50 mm/s"
Don't rely on memory.
Serious hobbyists document:
- Optimal temperature range
- Flow adjustments
- Speed limits
- Observed maximum stable Layer Height
This turns future troubleshooting into comparison instead of experimentation.
4Pre-Print Checklists to Catch Issues Before Starting a Long Job
Before launching a 12-hour functional part, run a quick pre-flight:
- Is the nozzle clean?
- Is filament dry and feeding freely?
- Are belts snug?
- Is the correct slicer profile selected?
- Has anything changed since the last successful print?
That 60-second scan prevents most cases of surprise 3D Print Under Extrusion halfway through a critical job.
Conclusion: Quick Reference Checklist for Fixing Under Extrusion
When layers won't fill and walls look starved, don't panic.
Confirm it's truly Under Extrusion by examining wall thickness and top-layer closure. Then work in order:
- Inspect spool, extruder gear, and nozzle for resistance or buildup.
- Increase temperature slightly and reduce speed to stay within safe volumetric flow.
- Adjust Flow Rate in small increments while observing wall thickness.
- Calibrate E-steps to eliminate baseline delivery errors.
- Measure filament diameter and create per-filament profiles.
- Inspect motion components if symptoms persist.
Under Extrusion becomes manageable when you stop guessing and start measuring.
Try this structured approach on your next problem print. Run a single-wall test, measure it, adjust deliberately, and document what works. Once your machine is calibrated and maintained consistently, extrusion issues shift from constant frustration to rare, solvable hiccups.
And that's when printing becomes predictable again.
3D printing and 3D scanning researcher with 10+ years of experience in materials science and additive manufacturing. Expert in FDM, SLA, and SLS technologies, covering in-depth guides, product reviews, top picks, troubleshooting articles, and industry news.