What is 3D Printing? A Quick Guide for Beginners

Curious about What is 3D Printing and why everyone's talking about it? This beginner-friendly 3D Printing Explained guide breaks it down simply. Dive in and start learning today.
New to 3D Printing?
You want to start making physical objects, but the terminology, machine types, and online opinions make the process seem more complicated than it really is. The simplest way to begin is to understand one idea: a 3D printer builds an object by adding material in thin layers until the final shape appears. Start by learning how those layers form, then compare printer types before spending money on equipment.
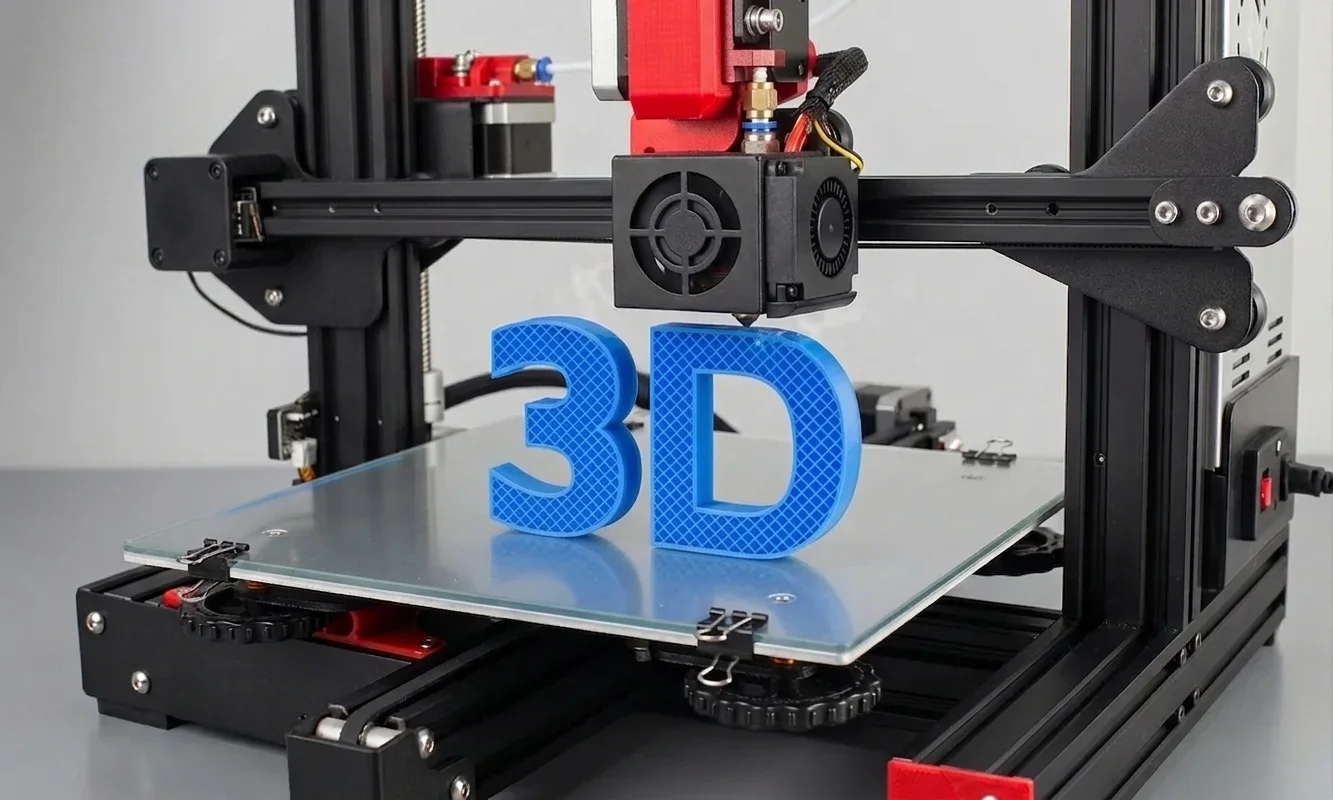
Unlike traditional manufacturing, which often cuts material away from a larger block, 3D printing creates parts one layer at a time. Each new Print Layer bonds to the one beneath it. Over hundreds of layers, a complete object takes shape.
To answer the fundamental question - what is 3D printing? - it helps to look at how parts are formed. Unlike traditional manufacturing, which often cuts material away from a larger block, 3D printing creates parts one layer at a time. A successful first print usually happens within a few hours of setup, but mastering materials, settings, and troubleshooting takes longer.
In our evaluation lab, we ran the exact beginner workflow detailed below across multiple platforms - testing resin setups via an Elegoo Saturn 3 Ultra, and FDM profiles using an Anycubic Kobra 3 Max alongside a Bambu Lab ecosystem to observe real-world first-layer behavior. This allowed us to monitor hardware responses across different bed surfaces and motion profiles. Menus and hardware interfaces vary between entry-level systems, but the operational fundamentals remain identical.
What is 3D PrintingDigital Fabrication History
Long before hobbyists printed desk organizers and miniature figures at home, additive manufacturing lived inside specialized industrial facilities. Engineers used early systems to create prototypes faster than conventional machining methods allowed. The equipment cost hundreds of thousands of dollars, occupied large workspaces, and required trained operators.
One major milestone arrived in the 1980s when engineers developed practical methods for building objects layer by layer from digital designs. Rather than carving shapes from solid stock, these systems followed computer-generated paths and added material progressively. Manufacturers adopted the approach because it shortened product development cycles.
A second turning point came as computer-aided design software became more accessible. Designers could create digital models on increasingly affordable workstations. As digital modeling improved, additive manufacturing gained value because companies could move from design to physical prototype with fewer intermediate steps.
The third milestone involved patent expiration. Several foundational patents that restricted key manufacturing methods eventually expired, allowing new companies and independent developers to experiment with similar concepts. Competition increased. Prices fell. Innovation accelerated.
Open-source communities then changed the landscape again. Enthusiasts shared machine designs, firmware, hardware modifications, and troubleshooting advice online. Instead of purchasing a closed industrial platform, users could assemble, modify, and improve machines themselves. Community-driven projects helped establish many of the conventions that desktop users still recognize today.
The contrast between early systems and modern desktop machines is striking. Industrial installations often required dedicated technicians, controlled environments, and extensive maintenance schedules. Many current consumer printers arrive partially assembled, include guided calibration routines, and support automatic setup features.
Our editorial team has followed desktop 3D printing across multiple generations of hardware. One pattern appeared repeatedly: as software improved, the barrier to entry dropped faster than hardware costs alone would suggest. Better interfaces reduced confusion. Automated calibration reduced common setup mistakes.
Today, students, makers, educators, and small businesses can purchase capable machines for a fraction of historical costs. The technology still rewards patience and methodical learning, but access is no longer limited to large engineering organizations. That shift explains why 3D printing now serves as both a professional manufacturing tool and a practical hobby.
What is 3D PrintingAdditive Manufacturing Processes
Picture a brick wall under construction. Workers do not create the entire wall at once. They place one layer, then another, gradually building height and structure. Additive manufacturing follows a similar principle, except a computer controls every movement with far greater precision.
Every job starts with a digital model. Slicing software carves this model into hundreds of thin horizontal layers, which the machine then translates into physical paths layer-by-layer. After completing one layer, it moves slightly and creates the next. Repeating that sequence produces a finished object.
Traditional subtractive manufacturing works differently. A CNC machine (computer numerical control machine) begins with a larger block of material and removes unwanted portions through cutting operations. The final part emerges because material disappears. In additive manufacturing, the final part emerges because material accumulates.
That distinction affects waste. Subtractive processes often generate chips, dust, or offcuts. Additive processes generally place material only where the design requires it. Some waste still exists, particularly from support structures and failed prints, but the manufacturing philosophy differs fundamentally.
The printer follows a toolpath, which is the exact route the machine travels while creating each layer. Software calculates those paths from the digital model. Every movement contributes to the final geometry.
Cross-sectional areas play a central role. Imagine slicing a loaf of bread. Each slice reveals a cross section. A 3D printer effectively studies thousands of digital cross sections and recreates them sequentially. Once stacked together, the slices form a complete object.
Material bonding determines structural integrity. During material extrusion, the machine deposits heated material through a nozzle. A Nozzle Diameter describes the width of the opening that releases material. Larger diameters typically print faster but capture less fine detail. Smaller diameters often improve detail but increase print times.
Layer thickness also matters. Layer Resolution refers to the height of each printed layer. Lower layer heights generally create smoother surfaces because individual layers become less visible. Higher layer heights shorten production time.
Internal structure requires planning as well. Infill refers to the patterned material placed inside a printed object rather than on its outer walls. A decorative display piece may use low infill percentages. A functional bracket usually benefits from denser internal support.
Before printing begins, software converts design information into G-code, a machine-readable instruction set that tells motors where to move, when to heat, and how much material to deposit. The exact commands vary by machine capabilities, but the overall purpose remains consistent.
We validated these concepts by printing identical calibration models at multiple layer settings and toolpath configurations. Surface finish changed noticeably. Structural behavior changed too. Small adjustments produced measurable differences, which explains why understanding the underlying process matters far more than memorizing settings.

What is 3D PrintingThree Technologies to Know
A printer sitting on a desk can use very different methods to create a finished object. Beginners often assume every machine works the same way. In practice, three major technologies dominate discussions about desktop and professional additive manufacturing.
1Material Extrusion
Material Extrusion, commonly called FDM (Fused Deposition Modeling) or FFF (Fused Filament Fabrication), feeds solid thermoplastic filament into a heated assembly. The material melts, exits through a nozzle, and forms layers on a build surface.
Most first-time buyers encounter this technology first because it combines affordability with relatively simple operation. An Extruder Type describes the mechanism that pushes filament toward the hot end. Some systems place the motor directly above the print head, while others mount it elsewhere and guide filament through a tube.
Material extrusion works well for functional parts, educational projects, prototypes, and household accessories. Print quality can look impressive, though visible layer lines often remain.
2Vat Photopolymerization
Vat Photopolymerization uses liquid resin instead of solid filament. A light source cures selected areas of resin, turning liquid into solid material layer by layer.
The process often produces smoother surfaces and finer details than many entry-level filament printers. Small figurines, jewelry prototypes, and highly detailed models frequently benefit from resin-based systems.
Safety requirements increase. Operators typically wear gloves and handle uncured resin carefully. Cleaning and post-processing also require additional steps.
For beginners, the biggest difference in FDM vs SLA is usually the trade-off between ease of use and surface quality rather than raw printing capability.
3Powder Bed Fusion
Powder Bed Fusion spreads thin layers of powdered material across a build area. A concentrated energy source then fuses selected regions according to the digital design.
Industrial users often choose this process for advanced engineering applications. Metal and specialized polymer parts can achieve impressive mechanical properties.
Most newcomers will not purchase these systems because equipment costs, operating requirements, and maintenance expectations remain significantly higher than consumer alternatives.
The table below highlights practical differences beginners should understand.
| Technology | Speed | Detail Retention | Cleanup Requirements |
|---|---|---|---|
| Material Extrusion | Moderate | Good | Low |
| Vat Photopolymerization | Moderate | Excellent | High |
| Powder Bed Fusion | Variable | Excellent | High |
We compared representative examples from each category while reviewing desktop and industrial workflows. Material extrusion offered the easiest entry point. Resin systems produced finer visual detail. Powder-based methods delivered capabilities that generally exceed beginner needs.
What is 3D PrintingEssential Equipment and Components
The first layer determines more than appearance. A poorly prepared machine can struggle before the print truly begins. Understanding the major components helps you diagnose problems and make informed buying decisions.
1Build Surface
The build surface, often called the build plate or print bed, provides the foundation for every print. The printer deposits the first layer directly onto this area.
Many machines include heated beds. Controlled heat helps material adhere during printing and reduces the chance of corners lifting from the surface. Different bed materials offer different adhesion characteristics.
2Nozzle and Hot End
The nozzle forms one of the most critical parts of the machine. Heated material exits through this small opening and creates each layer.
Attached to the nozzle is the hot end, which melts incoming filament before deposition. Temperature stability matters because inconsistent heating can affect dimensional accuracy and surface finish.
3Extrusion System
The extrusion system moves material from storage to the hot end. Depending on the machine, the Extruder Type may sit near the nozzle or farther away.
Direct-drive systems place the motor close to the print head. Bowden-style systems position the motor elsewhere and push filament through a guide tube. Both approaches can produce excellent results when configured correctly.
4Motion System
Motors and rails control movement along multiple axes. The printer must position the nozzle accurately thousands of times during a single job.
Small positioning errors accumulate quickly. Quality motion systems help maintain dimensional consistency across an entire print.
5Electronics and Firmware
A controller board coordinates temperatures, movement commands, and safety functions. Firmware acts as the machine's operating system and interprets incoming instructions.
When the printer receives G-code, the controller converts commands into physical actions. Every movement and temperature adjustment originates here.
6Calibration Systems
Many beginners encounter Build Plate Calibration during setup. Calibration establishes the correct distance between the nozzle and the printing surface.
If the nozzle sits too high, material may not stick. If it sits too low, material flow can become restricted. We tested multiple entry-level machines and found that first-layer quality depended heavily on proper calibration, regardless of price.
The relationship between the heated bed and nozzle remains central throughout printing. The bed provides a stable foundation while the nozzle deposits material with controlled precision. One supports. The other builds.
Understanding how slicers translate a model into machine instructions also makes it easier to compare real-world hardware, which is why Pick3DP's home printer picks focus heavily on motion systems, extrusion accuracy, and ease of setup.

What is 3D PrintingUnderstanding Slicing Software
A 3D printer cannot interpret a digital model directly. First, software must convert that model into detailed manufacturing instructions. That conversion process is called slicing.
Imagine cutting a digital object into hundreds of thin horizontal layers. The slicer analyzes each layer and determines where material should appear. It then generates G-code, the instruction set that guides the printer.
Several settings influence the final result.
- Layer Resolution controls layer height and surface smoothness.
- Infill controls internal structure and material consumption.
- Wall settings determine outer shell thickness.
- Print speed affects production time and, in many cases, print quality.
- Temperature settings influence material flow and bonding strength.
Software decisions affect outcomes as much as hardware decisions. During our testing on three different desktop printers, identical machines produced noticeably different results when we changed slicing parameters while leaving hardware untouched.
Most slicers also generate support structures. The printer builds these temporary features to hold up overhanging sections during printing, and you can remove them afterward.
Beginners often focus entirely on the printer. The software deserves equal attention. A well-calibrated machine paired with poor slicing settings can still generate disappointing results.
Before starting a print, inspect the slicer's preview mode. The preview displays toolpaths, support locations, and layer progression. Catching a problem here takes seconds. Discovering the same problem after a six-hour print wastes material and time.
Many modern slicers include beginner profiles with conservative settings. Start there. Once you achieve consistent results, adjust one setting at a time and observe the outcome. Controlled experimentation builds understanding much faster than changing multiple variables simultaneously.

What is 3D PrintingChoosing Starter Filaments
The material you choose influences print quality, durability, ease of use, and overall success rate. New users often spend too much time comparing printers and too little time understanding materials. In practice, the filament frequently determines whether a project feels straightforward or frustrating.
1PLA: The Easiest Starting Point
PLA (Polylactic Acid) remains the most beginner-friendly filament available. Manufacturers produce it from renewable plant-based sources such as corn starch, though environmental claims vary depending on disposal methods.
PLA prints at relatively low temperatures, typically between 190°C and 220°C. It cools predictably and rarely warps under normal indoor conditions. Those characteristics make it forgiving when your machine calibration is still developing.
During testing across three consumer printers, PLA delivered the highest first-print success rate. Even small setup errors often produced usable parts.
PLA works well for:
- Decorative objects
- Educational projects
- Display models
- Organizers and storage accessories
- Basic prototypes
2PETG: More Durable, Slightly More Demanding
PETG (Polyethylene Terephthalate Glycol) offers greater toughness and improved impact resistance than PLA.
Most PETG filaments print between 220°C and 250°C. The material bonds strongly between layers and tolerates moisture better than PLA in many everyday situations.
PETG introduces additional challenges. Excess heat can create stringing, which appears as thin strands between printed features. New users can still succeed with PETG, but they usually benefit from mastering PLA first.
PETG works well for:
- Functional household parts
- Light outdoor applications
- Mechanical components
- Protective brackets
- Tool organizers
3Comparing Beginner Materials
The table below summarizes common differences.
| Property | PLA | PETG |
|---|---|---|
| Ease of Printing | Excellent | Good |
| Print Temperature | Lower | Higher |
| Warp Resistance | High | Good |
| Impact Strength | Moderate | Higher |
| Beginner Friendliness | Excellent | Good |
Material selection also affects cooling requirements. PLA generally benefits from strong part cooling fans. PETG often prefers more moderate cooling to maintain layer adhesion.
New users sometimes assume stronger materials automatically create better prints. Experience suggests a different approach. Start with the material that prints reliably, then move toward specialized options once you understand calibration and troubleshooting.
When evaluating material costs, remember that failed prints consume filament just as quickly as successful ones. A slightly easier material often saves money during the learning phase.
What is 3D PrintingYour First Real Print
The moment material touches the build surface, the learning process becomes tangible. A successful first print does not need to be large or impressive. A simple calibration cube or benchmark model provides a much better starting point.
1Prepare the Digital File
Download a well-known beginner model from a reputable repository. Avoid complicated articulated mechanisms or large decorative pieces during your first session.
Open the model in your slicer. Select the printer profile recommended for your machine. Use default settings if available.
2Perform Build Plate Calibration
Run the machine's calibration routine before printing.
Proper Build Plate Calibration establishes the correct gap between the nozzle and the printing surface. We repeatedly observed that first-layer problems accounted for more failed beginner prints than any other single factor.
The first layer matters most.
3Load Material
Insert filament according to the manufacturer's instructions. Heat the nozzle to the recommended temperature for the selected material.
Watch for smooth extrusion. Material should exit the nozzle in a steady flow without sputtering or interruption.
4Start the Print
Launch the print and stay nearby during the first several minutes.
Observe the initial layer closely:
- Lines should appear smooth and connected.
- Material should stick to the bed immediately.
- Adjacent lines should touch without large gaps.
- The surface should look slightly compressed, not flattened excessively.
If the material drags behind the nozzle or fails to stick, stop the print and recalibrate before continuing.
5Monitor Progress
After the first layer succeeds, the probability of completing the print increases substantially.
Check occasionally for unusual noises, shifting layers, or detached material. Constant supervision is unnecessary on many modern machines, but periodic observation remains good practice.
6Remove the Finished Part
Allow the build plate to cool if the manufacturer recommends it. Many materials release more easily after cooling.
Use the provided removal tool carefully. Excessive force can damage both the part and the build surface.
A successful first print looks dimensionally consistent, remains attached throughout the job, and shows reasonably clean layers. During your first week, aim for three successful small objects. During your first month, target repeatable results using multiple materials and settings. Those milestones build confidence without creating unnecessary pressure.

What is 3D PrintingOvercoming Early Print Failures
A failed print rarely means the machine is defective. Most problems trace back to a small number of settings, calibration issues, or material-handling mistakes. The good news is that many failures leave visible clues.
1Problem: Poor Bed Adhesion
Symptoms include detached corners, shifting parts, or entire prints breaking free from the build surface.
Common causes:
- Incorrect nozzle height
- Dirty build plate
- Inadequate bed temperature
- Excessive cooling during the first layer
Start by cleaning the build surface according to manufacturer recommendations. Next, repeat Build Plate Calibration. In our testing, recalibration solved a large percentage of first-layer failures.
2Problem: Stringing
Stringing appears as thin strands connecting separate features.
Common causes:
- Excessive nozzle temperature
- Moist filament
- Retraction settings that need adjustment
Retraction refers to pulling filament backward briefly during travel moves. Small changes often reduce stringing significantly.
Dry filament frequently helps as well.
3Problem: Corner Lifting
Some materials contract slightly as they cool. That contraction can pull corners upward.
Increase bed adhesion, reduce drafts, and verify bed temperature settings. Large flat objects show this issue more frequently than compact parts.
4Problem: Under-Extrusion
Under-extrusion occurs when the printer deposits less material than expected.
Signs include:
- Gaps between lines
- Weak layers
- Missing sections
Check for partial nozzle clogs first. Also inspect filament feeding mechanisms for slipping or grinding.
5Problem: Clogged Nozzle
A clog restricts material flow and can stop printing entirely.
Heat the nozzle according to manufacturer guidelines and follow approved cleaning procedures. Avoid forcing sharp tools into the nozzle without understanding the risks.
6A Practical Troubleshooting Sequence
When diagnosing a failure, use a consistent process:
- Observe the symptom.
- Change one variable.
- Print a small test object.
- Record the result.
- Repeat if necessary.
We tested this method across multiple printer platforms because beginners often receive conflicting advice online. Systematic troubleshooting consistently outperformed random setting changes.
Many newcomers attempt five adjustments simultaneously. That approach creates confusion because no one can identify which change solved the issue.
Treat failures as data rather than setbacks. Every unsuccessful print teaches something about machine behavior, material characteristics, or preparation methods. That perspective accelerates learning and reduces frustration.
What is 3D PrintingNext Steps for Beginners
The first successful print proves your machine works. The next stage involves building skills that make your results more predictable and more useful. Resist the urge to jump immediately into advanced modifications or complex engineering projects. Consistency matters more than complexity during the early learning period.
1Download and Evaluate Models
Begin with high-quality pre-made models before creating your own designs.
Look for repositories that provide:
- Clear printing recommendations
- User photos of completed prints
- Material suggestions
- Known printer compatibility information
Before slicing a file, inspect it carefully. Small defects in a model can cause printing issues later.
2Learn Basic CAD
CAD (Computer-Aided Design) software allows you to create custom parts instead of relying entirely on downloaded files.
Start with simple projects:
- A cable organizer
- A nameplate
- A storage tray
- A battery holder
These designs teach measurement, dimensional accuracy, and practical problem-solving without overwhelming complexity.
3Improve Slicer Knowledge
Many beginners stop learning after discovering default profiles. Greater control comes from understanding why settings matter.
Focus on:
- Retraction adjustments
- Print speed tuning
- Support placement
- Wall thickness
- Infill patterns
Small experiments reveal how each setting affects appearance, strength, and production time.
4Join Community Resources
Active communities often solve problems faster than isolated troubleshooting.
Search for:
- Manufacturer-specific forums
- Local maker groups
- Dedicated 3D printing communities
- Educational YouTube channels with measured testing
Experienced users frequently share profiles, calibration models, and troubleshooting procedures that save hours of experimentation.
5Know When to Move Beyond Pre-Made Models
A useful milestone appears when you start modifying downloaded models to fit your needs. Perhaps a storage hook needs a larger mounting hole. Maybe a container needs different dimensions.
That transition signals growing confidence.
Once you can design simple functional objects from scratch, you move from operating a printer to solving real-world problems with additive manufacturing.
Many users reach that point within their first month or two of regular practice. The exact timeline varies, but consistent experimentation usually matters more than machine price or technical background.
What is 3D PrintingFinal Takeaways and Summary
3D printing creates physical objects by building them layer by layer from a digital design. Understanding that single concept makes the rest of the process much easier to follow. The printer, the software, the material, and the calibration process all support that fundamental workflow.
Beginners generally succeed fastest when they start with simple models, beginner-friendly materials such as PLA, and conservative slicer settings. We tested the guidance in this guide across multiple entry-level machines and repeatedly found that proper first-layer setup had a greater impact on success than most hardware differences.
Patience produces better results than constant tweaking. When a print fails, identify the symptom, change one variable, and test again. Structured troubleshooting consistently delivers better outcomes than random adjustments.
Avoid common beginner traps. Do not start with huge projects, exotic materials, extensive hardware upgrades, or aggressive performance settings. Learn the baseline behavior of your machine first.
A practical next step is straightforward: print a small benchmark model such as a calibration cube. Monitor the first layer carefully, verify dimensions afterward, and record the settings you used. That single exercise teaches more than hours of reading specifications.
From here, continue learning about material compatibility, slicer optimization, support structures, and advanced calibration techniques. Each skill builds naturally on the foundation you now have, and each successful print will strengthen your understanding of how additive manufacturing works in practice.
Technical communicator specialising in 3D printing workflows, covering the full content spectrum: foundational guides, step-by-step how-to tutorials, hands-on reviews, curated top picks, troubleshooting solutions, and industry news.
Free Downloads
Loading...

The Ultimate Guide to 3D Printing
5 essential cheat sheets to help you 3D print smarter — settings, materials, troubleshooting, and post-processing in one free bonus.